WEEK 1
This week we began learning the interface of Nuke. We practiced moving the nodes around to work in order and adding merge nodes to see the final outcome. Below are the template composites that I completed.


Compositing an image over a background image was the focus in this activity. the examples here show a Star Wars style rider in a forest blurred as if in motion and a young boy overlaid on to an image of a toy room.
Below each image are the node graphs used to create the compositions.


The Node Graph
The Interface

The Properties Tab
The View Port
WEEK 2
This week we learned how to Rotoscope on to an image. I used this image of coloured sweets and rotoscoped around each one using the B-Spline tool. Below shows the full process.


I started by creating the nodes that I needed before rotoscoping the image (as seen on the left).
The roto node creates the alpha channel needed to separate the rotoscoped sections from the original image.
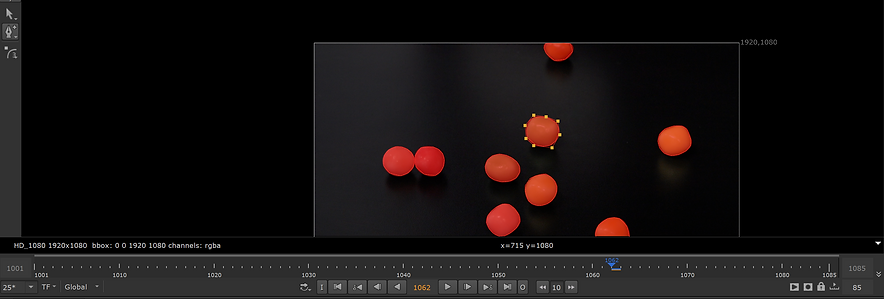

I then used the B-Spline tool to draw around the shapes I wanted to rotoscope.
As I did each shape, I re-named them in the properties tab for better organisation should I need to come back to them.
As seen above, each shape develops a red line around them to show which have been done.

I then used the blur node to add a feather to the shapes to prevent any harsh edges and make the shape blend better with the background.

This is the final result with the Matte mask on showing the rotoscoped sections in red.

This is the final result with the Alpha channel showing. This shows which sections have been removed from the image.
WEEK 3
This week I focused on more advanced rotoscoping by rotoscoping round the persons hand as it moves at various keyframes. Below shows the node graph used.

Whilst rotoscoping I made sure to organise into folders for each finger so making changes are easier. I also changed the colours of each roto round each finger to separate them.

Here shows the sections of the fingers as I rotoscoped. Separating the finger joints makes following movements more accurate and moving the shapes easier.
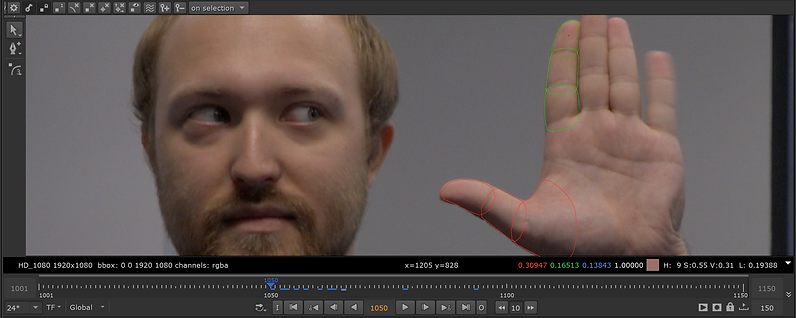
The three fingers final rotoscope with view of the properties panel.

Here I have shown it with the matte mask on top to show where the roto will follow.

Example of compositing in film and tv is shown in "CGI & VFX Showreels: "Digital Compositing Breakdown Reel" - by Balázs Sántha" by TheCGBros 2017. It is a showreel of how compositing creates/effects the final scenes.
WEEK 4
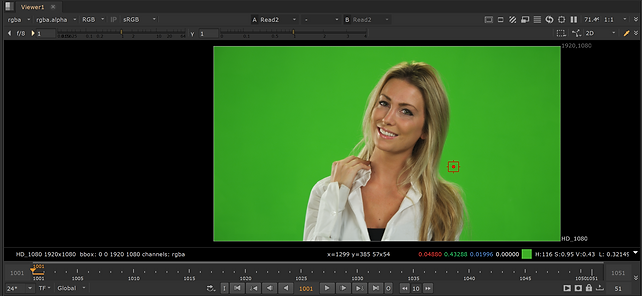
This week I learned Key Lighting in Nuke to swap out background son the following images. beginning with a Key Light node and change the black and white values is the first step. Followed by rotoscoping the unaffected areas.


Key lighting the sky till it turns black in the Alpha channel. The landscape being kept will be white with some transparency.
Rotoscoping the landscape I want to keep.

Node Graph:

Before:
After:


Node Graph:


Keylight:
Before:
After:

Erode:


Node Graph:
Before:
After:

WEEK 5
This week we looked at colour correcting using the grading tool. This is used to make the images in a scene match up colour wise and/or set a certain look to a scene, this could be to convey an emotion.
To achieve this we use the grading node to match up the colours using the colour wheel shown below, this is useful for matching warm or cool tones or picking contrasting tones.
Colour Corrector:

This image I colour corrected to bring down the warm tones of the woman to match the cool toned background.
Final Outcome:

In this exercise I used the roto node to change the colour within a specific section, in this case the door frame. The process is the same except using the roto node to separate the desired section first.
Script:

Final Outcome:

In this one I used the keyer node to change the alpha channel black and whites. Then I used the colour grader to manipulate the whites into a different colour, here being a green hue.
Script:

Keyer:

Final Outcome:

Script:

Colour Lookup:

Before:
This changes the balance of colours within a chosen area of the image. In this instance I was balancing the black and whites of the statue.

After:

The aim of this exercise was the make the objects composited into the background images blend together by balancing and changing the colours of the objects. I added a blue/grey hue, brought up the blacks and brought down the whites, applied light direction to the top of the statue and balanced the colours using the colour lookup. In the final result it can be seen that the statue figure now looks like it belongs in the scene more realistically.
Colour Checker:

The role of the colour checker is to help the cinematography achieve balanced lighting and set a colour grade for the scene. This keeps the colours constant throughout filming.
The different effects of colour grading in a game scene:

Colour correction examples in film:

The colours in the checker are cyan, green, magenta, yellow, red and blue and are perfect swatches (hence why they cannot be tarnished). Placing the checker in a scene in front of the camera helps cinematographers correct the pictures colour in their chosen software. This means they can then get the perfect colour for each shot which makes the film more cohesive. The colour checker is to be a constant whilst lighting, cameras, lens all get changed.
Bibliography:
Shinnick, T. (2019) Production tips: Working with a color checker on your next shoot, The Beat: A Blog by PremiumBeat. Shutterstock. Available at: https://www.premiumbeat.com/blog/working-with-color-checker-color-chart/ (Accessed: November 7, 2022).
"The Cinema Cartography: Colour in Storytelling."
WEEK 6
Workshop
In this workshop I took part in two tasks. The first was compositing the below video so all elements of the video fit the scene together. I also cleaned up the video by adjusting the focal distance and grain.
Below is the final video.
The second task was to put together the nodes for the next video and clean up the green screen footage by removing tracking markers, wires and stands in the image.
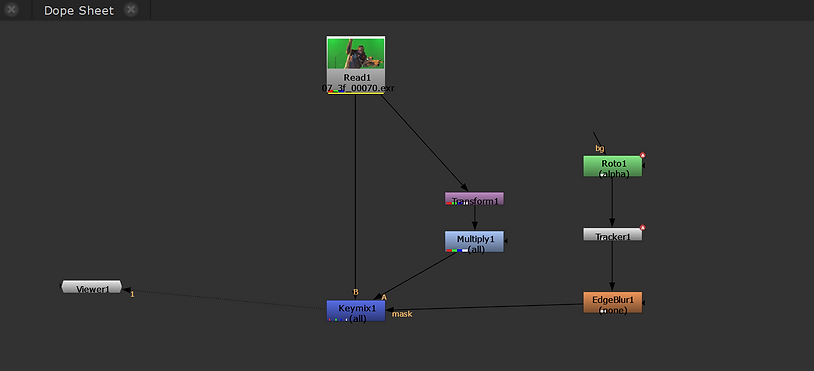
I used rotoscoping on each keyframe to cleanup the image as seen in the script above.

Here the tracking dots and stand on the right are removed.

Then I rotoscoped around the gun as it crosses over one of the removed tracking markers and needed to see be visible. I then used the roto-paint tool to cleanup the guns edges.


WEEK 7
Advanced Keying
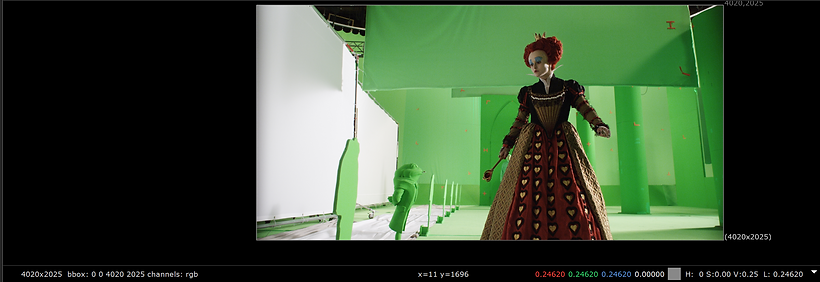
Because this image is not taken with a good green screen there are multiple shades of green that need keyed out before the garbage matte can be added. The different greens would make the image lose all the finer details if the sections were not keyed individually.
Keylight node graph.

Final Garbage matte

Right hand side completed with keying and roto.

WEEK 8
Tracking
Clip 1
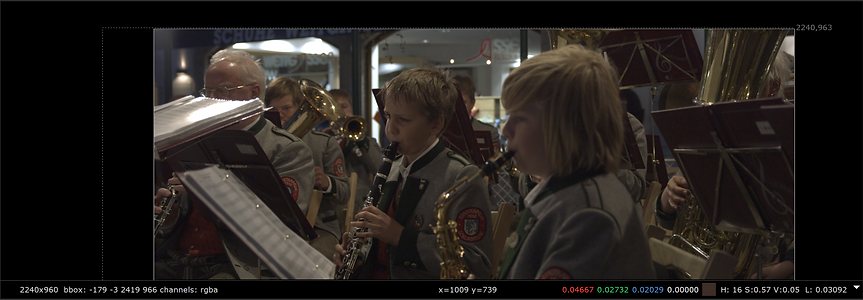
In this image there is a patch over the shop sign that does not follow the camera movement, therefore it needs a tracker added.

Here I attached the tracker to the red of the logo and played the clip to track the movement.

Using the traffic light buton I can see if the tracker has been successful as the tracking line should be green.

Here is the tracker node and the settings used. I used frame 1001 as the reference frame.

Final image taken halfway into the video; the grey box no longer appears as the image moves with the camera.
Clip 2
On this clip I wanted to track the small square building across the screen and change the colour overlay to highlight the area. For this I started with a two-point tracker, as can be seen below. Once tracked I applied a roto draw node and drew around the selected building. I then applied a grade node to change the colour to blue. As the tracker moved across the screen the roto deformed slightly towards the end, so I adjusted the shape within the relevant keyframes.


Final clip shows the selected building highlighted blue and following across the screen.
Roto Node:
Tracker:
Clip 3
On this clip I tracked the windscreen of the car as it drives. I used a different method called planartrack which uses a flat plane to track the four corners of the plane. I used the roto node to select the shape again and linked it to the planartrack. I then followed the same process as before with changing the colour of the roto with the grade node. I used the cornerpin node to bake in my planartrack.

Roto Node:

Grade Node:

Tracking:

CornerPin Bake:

As there is no box to select the reference image, the information/figures in the cornerpin2D page needs to be copied into the Node page and the button with the squiggly line needs the animation removed (click: remove animation).
Final Clip:
WEEK 9
Clean-up and Patch Repair
Here I used the tracking and roto paint tools to clean-up this green screen image. I tracked each of the yellow tracking markers and then applied the roto paint by cloning the green of the screen on to the marker to cover it. Once painted I applied the roto to every frame and copied the transform information from the tracker to the roto paint transform (translate and center x). This applies the movement of the tracker to the paint.
Original Image

Tracker

Roto Paint

Transform Information

Control click and drag the squiggly line of the translate and center x from the Tracker to the Roto Paint.
Final Clean-up

Node Graph

In this exercise the goal was to remove the old man walking in the background of the image sequence. To do this I used a similar process as the previous exercise in which I used a roto shape to block out the man by using a freezeframe. This applies the freeze frame over the roto image. I then used the grain node to match the grain of the original image to the roto plane.
Original Image

Roto Shape

Node Graph

Matching the Grain
This grain node shows the original grain compared to the new.

Final Clean-up

WEEK 10
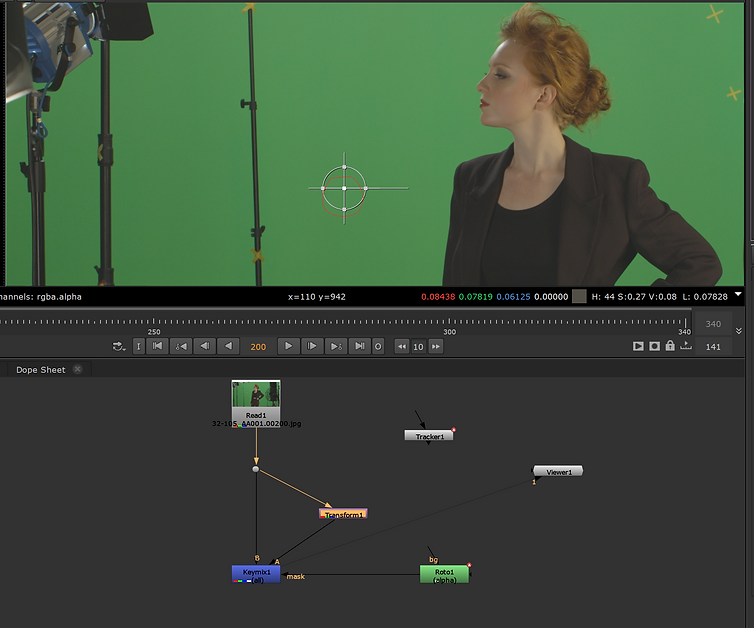
In this exercise the aim was to execute a cleanup on this image sequence by removing the tracking markers on the green screen firstly. This I achieved by tracking the markers and then rotoscoping around them. I then used the transform to apply another area of green screen over the top of the marker to cover it and blend it with the background.
Original Image:

Roto & Tracker:
Cleanup:

All Tracking Marks Removed:

Cleanup Script:

Then I wanted to remove the extra equipment in the scene. To do this I needed to create a garbage mat, where I first rotoscoped around the woman, then I adjusted the alpha to balance the blacks and whites appropriately. Finally, I added a constant which meant I could change the overall colour of the background which I made blue as seen below.
Roto:

Removing Background:

Replacing Background:

Garbage Mat Script:

Original Image:

Planar Track:

Removing The Logo:

Final Image with New Logo:

Removing the Logo Script:

Adding the Logo Script:

A1
Park bench, wet paint sign, painter bag.
WEEK 11
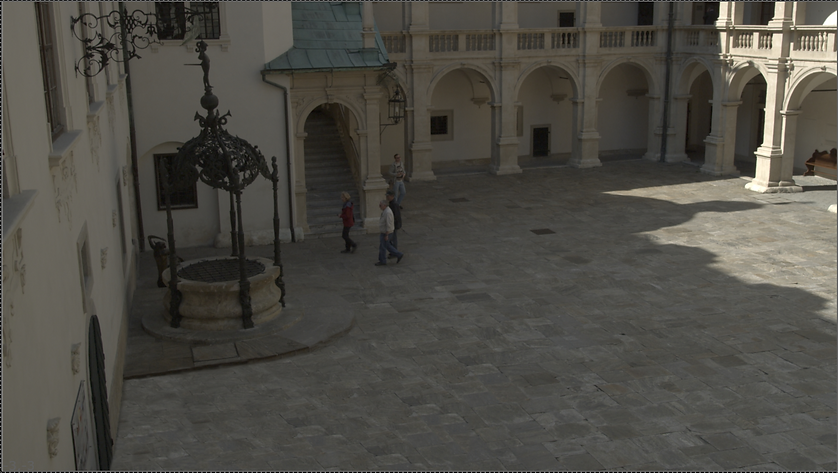
In this exercise the aim was to remove the group of people in the bottom corner. To do this firstly I planar tracked an area of the cobblestone. The I roto-drew around the group of people and then roto- painted over the top by sampling from the cobbles. Finally I used the grade node to make the shadows match by lowering the gain.
Original

Roto

Rotopaint

Grade

Final
Assignment 01 (PRACTICE)
For assignment 1 I wanted to create a scene in a park with some form of painting on the wall with a wet paint sign in the screen, I also wanted to change the label to a paint supply label to tie in with the scene. I then plan to experiment with the lighting to try get the images to work together. My second idea is to remove the screen and wall completely and use a video as the background instead and layer a video of birds flying past or people walking in the background.
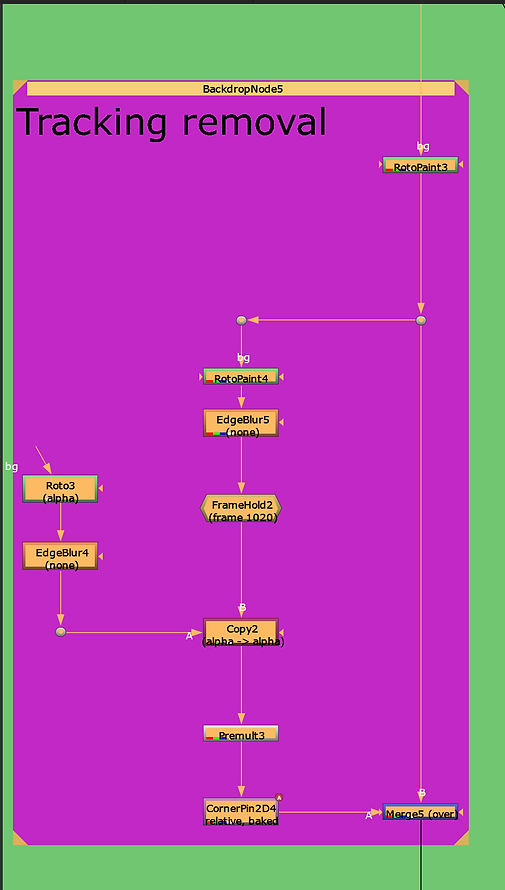
Tracking Removal:


Bag Logo Removal:


Applying New Bag Logo:

Applying Background:

Assignment 01 - Final
Clean-up Version
In this one the objective was to replicate the scene given to us for the first part of the assignment. This included, removing the bag logo, changing the background to blue, removing all tracking markers and changing the screen to colour bars.
Blue Screen Clean Up:

Rotoscoping the man:

Full Script:

Background Keying:

Removing the Tracking Markers:
Final Clip:
Creative Version
In the end I changed my creative idea and decide to do a scene from inside the University. I took a photo of the entrance to the University to be the background. I used images of the UWL logo for the wall and screen and chose an IT logo for the bag as if the man is a technician fixing the screen. Below is my process and scripts.
Whole Script:

Tracker removal and clean up:

Changing the bag logo:

Changing the background:

Changing the background:

Changing the computer screen:

Progress shot:
